 Lead rot. We've all heard about it. It's the bogeyman looming behind
the corner, threatening to take away all our precious figures and
nullify hours upon hours of labor spent painting them.
Lead rot. We've all heard about it. It's the bogeyman looming behind
the corner, threatening to take away all our precious figures and
nullify hours upon hours of labor spent painting them.
Lead rot. We've all heard about it. It's the bogeyman looming behind
the corner, threatening to take away all our precious figures and
nullify hours upon hours of labor spent painting them.
But who has actually seen lead rot in action? For the longest time, I really had not. I had a few old metal figures that were maybe a little dull, but nothing actually eating away at the physical details. Sometime a little bit white dusting, probably actual lead oxide, but nothing that couldn't be quickly brushed off before painting. But then that changed.
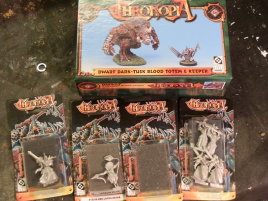
I had heard rumors about lead rot plagueing the old Chronopia figures, but that didn't stop me stocking up on them when Prince August was clearing them out. Among the several figures I bought, I finally encountered my first examples of clearly identifiable lead rot.
Disclaimer on the nomenclature: Some may say that what I am describing here is not actual lead rot. That may well be, depending on your definition of lead rot. Quite frankly, lead rot is not a scientific or technical term. For the purposes of this article I will arbitrarily define lead rot as any decay or corrosion that develops in long term storage and negatively affects metal figures. It may be that there are more types of this vile plague out there. I am not speaking theoretically here. I wrote this to talk about what I encountered and how I dealt with it.
 A couple of the boxed sets I bought contained figures with clear
disfiguration caused by some sort of decay. I never saw it on any of
the figures in blisters, and only part of the boxed sets were
affected. I wondered why this would be...
A couple of the boxed sets I bought contained figures with clear
disfiguration caused by some sort of decay. I never saw it on any of
the figures in blisters, and only part of the boxed sets were
affected. I wondered why this would be...
In various theories about lead rot lack of air circulation is named as one of the culprits. I can't claim to be an expert on the chemical processes involved, but I can vouch for my experience:
All the cases of lead rot I have seen were present in shrink-wrapped boxed sets.
It seems to me that the shrink-wrapping has trapped the models in a sealed environment with something they do not like. It could be something coming off the foam inserts in the boxes, it could be just regular air. But the other boxed sets did not show the symptoms even though some of the metal parts were in sealed ziplock bags. One of the affected sets was all metal parts, one was metal/resin hybrid kit.
 Since these models were old stock probably from the 90's, they had had
a long time, over a decade, to develop the symptoms. I have a lot of
figures that old that never had any problems -- possibly because I
never could resist the temptation to open the boxes straight after
buying them, even if they were only to join the ever-growing pile of
lead. I may have unwittingly saved myself from huge problems... or
not, depending on how you want to look at it.
Since these models were old stock probably from the 90's, they had had
a long time, over a decade, to develop the symptoms. I have a lot of
figures that old that never had any problems -- possibly because I
never could resist the temptation to open the boxes straight after
buying them, even if they were only to join the ever-growing pile of
lead. I may have unwittingly saved myself from huge problems... or
not, depending on how you want to look at it.
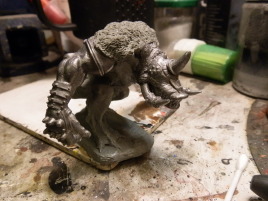
Faced with the reality, I had basically two choices: dump the models or try to do something about it. To decide, I chose one kit and took a closer look at what I was actually dealing with.
|
|
|
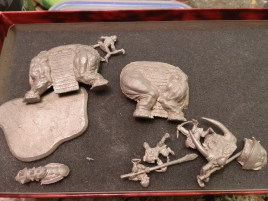
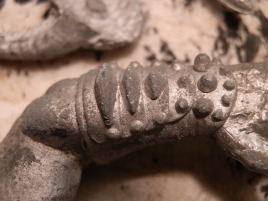
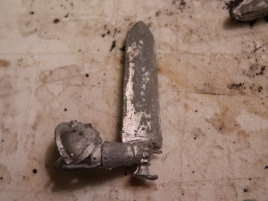
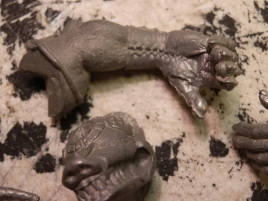
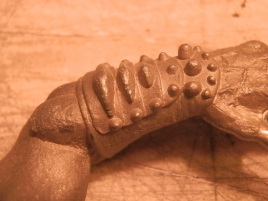
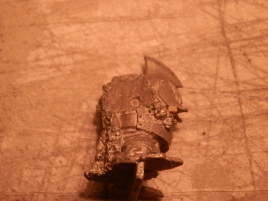
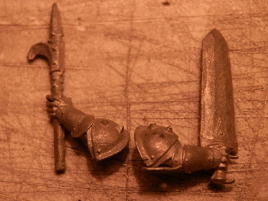
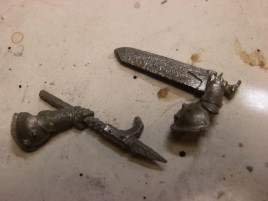
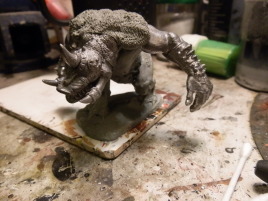
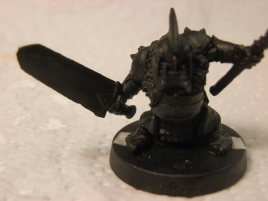
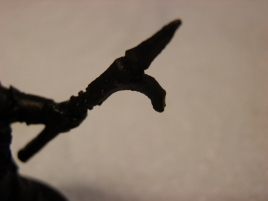
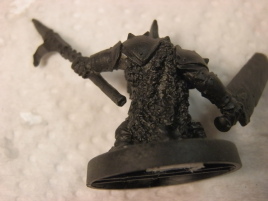
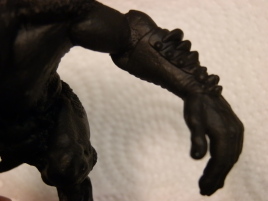
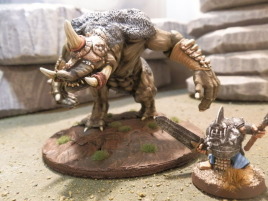
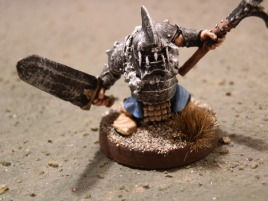
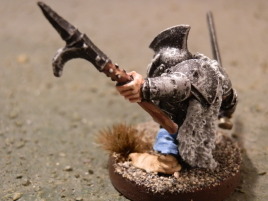
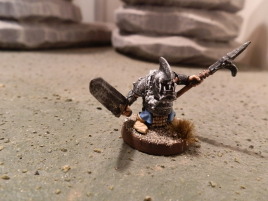
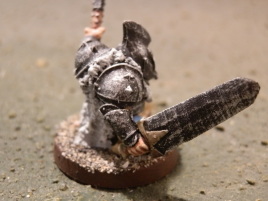
| Chronopia totem. Lead rot evident on metal parts. | Closer look at the rot on the arm of the totem. | Bad lead rot on the sword. |
|
|
|
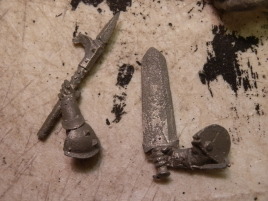
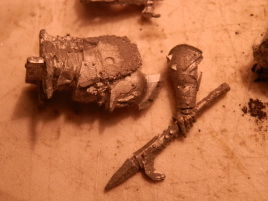
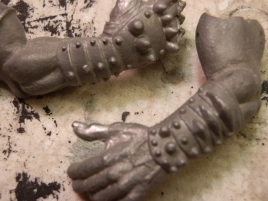
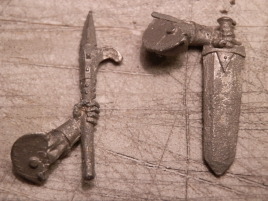
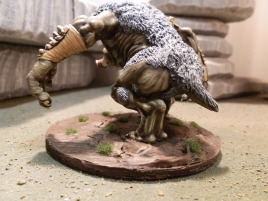
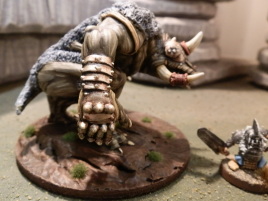
| Rot is evident on both sides of the weapon arms. | Rot evident on the spear and figure body. |
As you can see, there was a rough dull gray growth on the parts, looking almost like fungus. This stuff was actually pretty hard, it did not flake it, it did not brush off and by the looks of it, it was spreading.
This obviously leads to two questions:
Let's start with the first issue. It was immediately obvious that any amount of huffing and puffing was not going to do it. This would have to be physically removed and the damages fixed. There's been good results with acid baths in dealing with rusted car parts and such, but they depend on getting the strength of the acid right so it will eat the rust but not the healthy metal. I wasn't too keen on trying my hand at that, so I chose to pursue mechanical means.
I didn't have a whole lot of parts to deal with, but I'm not a big fan of cleaning models to begin with and I was interested in methods for dealing with large quantities of affected models, should such a calamity befall one. I was also interested in finding the minimum force required to remove the decay, because obviously any physical removal method runs the risk of damaging details on the model.
Thus I started with a tumbler and some corn media. I happen to have one for polishing brass cases, but they are relatively inexpensive and readily available. I plopped the parts in the tumbler and let it run for about five hours, which is what I normally use for brass. Here are the results.
|
|
|
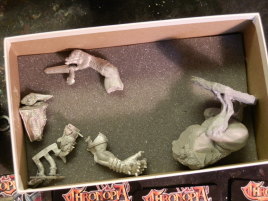
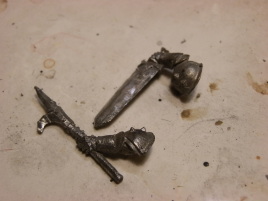
| Here are the parts after tumbling. | Tumbling has removed the obvious rot deposits, but left a dull grey sheen on the parts. | This is looking much better, though. |
|
|
|
| The dwarf's body is also looking pretty good. | The tumbling didn't work as well on the small parts. | There is still quite considerable rot on these parts. |
Some of the parts were pretty much okay after tumbling, others were better but still not acceptable. In this case the larger parts came out better, but I think that has more to do with the extent of the rot before tumbling rather than the size or weight of the parts. They are all heavier than the brass cases I normally run through the tumbler.
Tumbling did dull the sheen on the parts (I did not use a polishing agent), but I don't think it affected any actual surface detail that would still be visible after painting. After all, we are all used to minor imperfections in the metal that will be covered by a coat of paint.
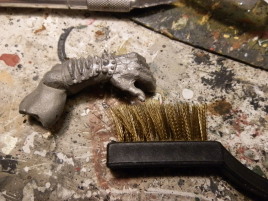
Time to take it up a notch and bring in the old elbow grease. I took out my wire brushes and started working on the parts. Wire brushes, especially used with force, are not precision tools in this context. Thus I started with the brass brush to minimize unnecessary damage and worked up to the steel brush only where necessary.
|
|
|
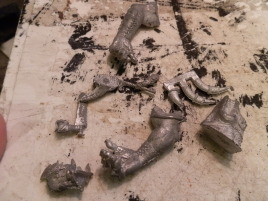
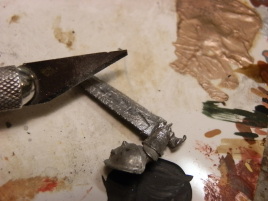
| Ok, let's try the brass brush next. | We need something stiffer for this... bring in the steel brush! | Still no good, this rot is pretty bad. |
The brass brush was enough to finalize the parts that already were in pretty good shape after the tumbling. It did help on the other parts as well, but it was not enough to fix them. The steel brush went further, but the damage on the worst parts was just too tough.
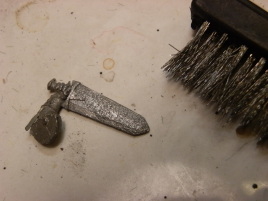
When all else fails, it's time to whip out the trusty old scalpel. I simply attacked the rot and cut it away as if had been a particularly heinous mold line or other casting imperfection.
|
|
|
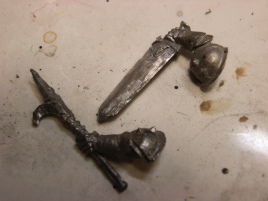
| Ok, time for the trusty scalpel. | Rot mostly eliminated, but detail is lost. It's also hard to get into all the smallest crevices. | Can't get better than this. If this doesn't help, then it's onto cutting off the affected parts (weapons) and replacing them with something new. |
The scalpel managed to cut away the rot, but it also became very evident that the rot was not something on the metal, it is the metal. The rot seems to eat away the surface detail and transforms it into this weird growth. Cutting it away can save the part but the detail is lost forever.
This was all hard work, but very much doable. The big question was ofcourse whether this had all been in vain? Would the rot just return? Would the rot seep from under a paintjob and ruin hours of work?
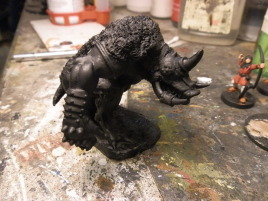
There was only way one to find out, and no easy way around with no TARDIS in sight. I would assemble the models, prime the parts and set them aside for a reasonably long period to observe if there was any signs of the rot returning. Initially I intended to wait for six months, but things happened as they are wont to do and a little over a year passed.
|
|
|
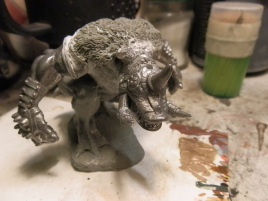
| Mr. Piggy basic assembly. | The gaps are rather pronounced in places. | Some filler applied. |
|
|
|
| Mr. Piggy primed and ready -- now we'll wait for 6 months to see if there's any problems. | A year or so later, looks like the rot was stopped. | It's rough, but the damage has not spread any further. |
|
|
|
| Looks pretty ok from this side too. | Here's the lead rot victim finally getting painted. | Closeup on the arm. No evidence of further decay. |
Success! I could detect no signs of further rot. There was no bubbling, no flaking of the primer, nothing untoward. Even on the very smallest parts where I was unable to remove the last few bits of rot, there were no signs of it spreading any further. Seems a wiff of primer sealed the problem away for good.
Based on this experience I can only conclude that lead rot very much resembles rust on iron-based metals and it can be treated in very much the same fashion. The first item is to fix the environmental conditions causing the rot. This can be as simple as ripping off the shrink wrap from your boxes.
Then the rot has to be removed until only healthy metal remains. Various physical methods can be used depending on the extent of the damage and available tools. In some cases it may be easier to cut off affected parts completely and to replace them with new parts.
And finally the parts should be protected against any further rot. A simple coat of primer seems to suffice. The rot does not seem to be a self-sufficient process, it needs certain environmental conditions and once contact with those is eliminated, it does not spread any further.
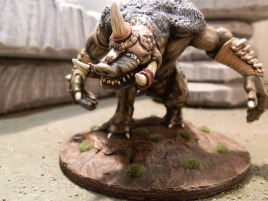
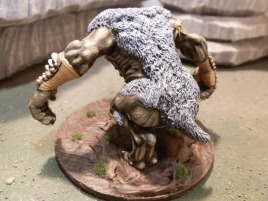
Well, I had to paint the thing to see there really were no further issues. Here are some pictures of the finished product.
|
|
|
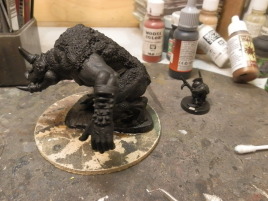
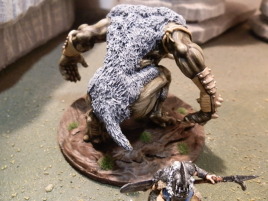
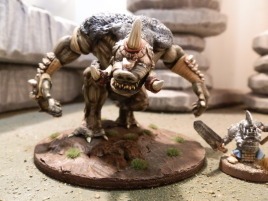
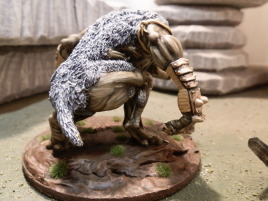
| The big guy was really fun to paint and actually quite fast too. | It was actually a little bit difficult to paint some things on the underside due to the huge base. Maybe I should have added that later... | Fist detail. |
|
|
|
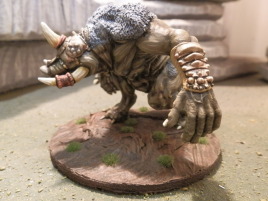
| I don't really get what the tusk warmers are supposed to be. | I did six stages with the fur, probably overdoing it. | I was initially a little hesitant to do 3-color on this scale, but it worked pretty well in the end. |
|

|
|
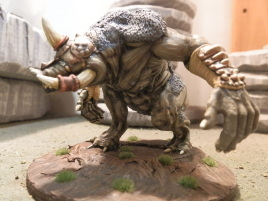
| I actually like this arm better. | Better view on the arm muscles. | For some reason the left hand protection is different. |
|
|
|
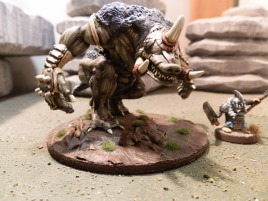
| The pose is so hunched over one wonders why it doesn't fall over. | The breast muscles are interesting to say the least. It also appears to have four nipples. | It's actually pretty easy to paint because the muscles are so super well defined and even the small details aren't actually that small. |
|
|
|
| There ws pretty substantial lead rot on this one. | The goading spear is a bit rough due to the rot. | Not a whole lot of surface to paint on these. |
|
||
| The sword also suffered. |
| Lead Rot | Tony (guest) | Oct 01, 2016 11:03 |
|---|---|---|
Thank you for the article - I found it very interesting and informative. I have seen others who place the miniature in vinegar - have you read similar? I have also heard that it is good practice to varnish the base metal/lead with solvent based gloss varnish (Ronseal in the UK). Tony |
||
| Horses for courses | maxxon | Oct 03, 2016 08:53 |
Hi Tony, Vinegar is acidic, so it probably could be used to remove to corrosion. I know citric acid is used to remove rust from auto parts. I think the important thing is removing the corrosion by any means necessary, chemical or mechanical. Use whatever method you feel comfortable with. I think the same goes for sealing. The important thing is to seal the metal from contact with air, the exact product used is probably not so important, though solvent-based varnishes may have a tougher finish if you're worried about later abrasion damage rekindling the rot.
|
||
| Don't use vinegar | Concerned citizen (guest) | Jan 26, 2024 06:20 |
Dear god don't use vinegar to clean lead rot. Vinegar contains a good percent of acetic acid which is massive driver of lead rot. So many ways this can go wrong! Use something else. |
||
| Dear concerned citizen | maxxon | Jan 26, 2024 06:35 |
Interesting... do you have actual experience with this? Would that include other acids as well? |
||

This work is licensed under a Creative Commons Attribution-NonCommercial-NoDerivs 2.5 License.
Copyright 2003-2021 Mikko Kurki-Suonio
 Sucks!