The House Factory
 There are two holy grails when it comes to wargames terrain. One is the
integrated trench system and the other is a fully realized city. The
reason most people don't really build a trench board is because it's
hard to store and at the end of the day rather limited use really.
The reason most people don't build a full city board is the cost (and the
storage issues). Scratch building tens of buildings is hard work
and buying multitudes of buildings makes an atomic crater-sized hole in
one's wallet. That's why you see battles revolve around a lone farmstead far
more often than even a small hamlet let alone a full city block.
There are two holy grails when it comes to wargames terrain. One is the
integrated trench system and the other is a fully realized city. The
reason most people don't really build a trench board is because it's
hard to store and at the end of the day rather limited use really.
The reason most people don't build a full city board is the cost (and the
storage issues). Scratch building tens of buildings is hard work
and buying multitudes of buildings makes an atomic crater-sized hole in
one's wallet. That's why you see battles revolve around a lone farmstead far
more often than even a small hamlet let alone a full city block.
I'm not that different from the next guy. I too dream of heated house to
house fighting and maybe a running battle through crowded streets. I even went
as far as to build a
ruined city
out of mostly scrap cardboard. While the results were acceptable for ruins,
it also showed to me that scratch-building intact buildings was going
to be a whole lot more work. I buried hopes of building my very own
city.
Well, things change. Lately the change has been brought by proliferation
of laser-cut MDF buildings. These are far cheaper than resin buildings yet
substantially easier to put together than scratch-building from foamcore.
Some time ago I bought a bunch of MDF buildings from
Warbases.
The dream of the city has been rekindled.
Let's see how they are to build.
Assembly
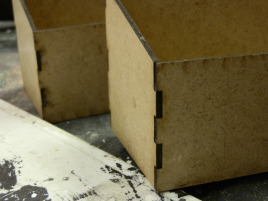
Laser-cut MDF is pretty easy to assemble. MDF takes ordinary white glue
really well and jigsaw joints lock the parts pretty well together. The
floor piece is a great help keeping the corners square (my usual point
of failure when making buildings out of plain sheet materials). Still,
dry-fitting is a good idea.
The Modular Buildings
You can build the modular buildings individually, but I guess the real
idea is to glue a couple of them together to form larger buildings. However,
I had this stubborn idea about a row of houses lining a cobblestone
street so I decided not to combine kits.
The basic buildings were easy to assemble. The only real problem was the tower
kit. For some strange reason the back wall was about 2mm wider resulting
in a not square layout. Also, to be better able to use it in a game I
raised the floor to about midpoint using bits of scrap wood.
The modular buildings don't come with pre-cut holes for doors and windows,
you're supposed to glue the door and window pieces directly on top of
the walls. My initial thought was not to glue them on but rather paint
them separately and use blu-tac to attach them to convenient locations
in use. However, after deciding the walls really needed some texture I
realized that the textures wall was not going to be even enough for
this approach so I went ahead and glued them on anyway.
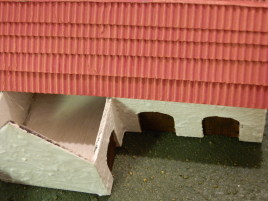
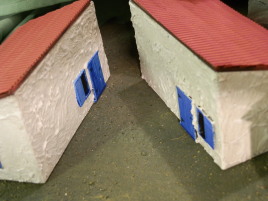
To retain some of the modularity, I only put doors and windows on one
side of the back walls, the same side on all the buildings. This way
I can place the modules back-to-back without doors/windows pressing
against each other. This will serve to minimize the gap between the
modules. Likewise, only one end wall got doors/windows.
|
|
|
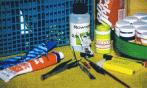
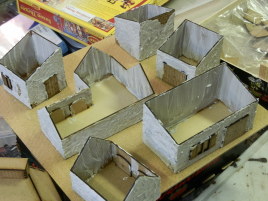
| Laser-cut MDF seems to be the latest rage in wargames terrain, so I ordered a few sample buildings from Warbases. These are from their modular buildings range. I'm going to try to see if I can keep them modular even after assembly. |
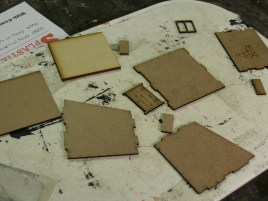
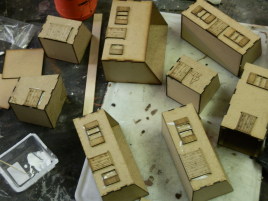
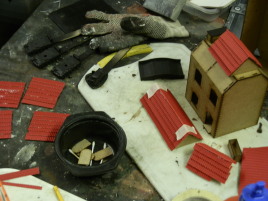
Here's the selection of modular houses I got. You can use these as is, or glue them together to form larger houses. |
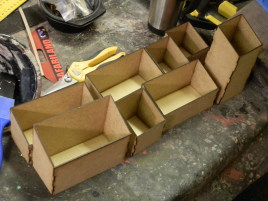
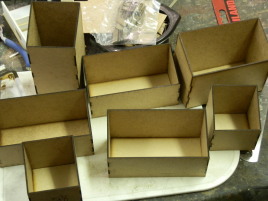
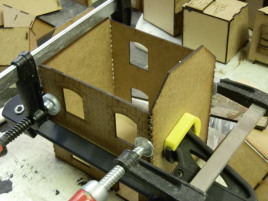
Hmmm, another shot of the assembled frames. |
|
|
|
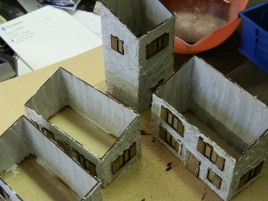
| Gotta do something about these joints, though... |
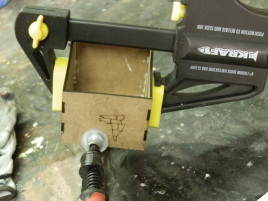
A couple of clamps help while the glue dries. To be really pedantic, you'd need a couple of stiffer boards under the clamps. The MDF bends a little too much by itself. |
My initial idea was to leave the doors and windows off and attach them with blu-tac as necessary, but in the end I decided to glue them on. |
|
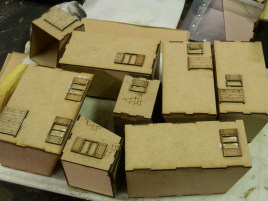
| Glueing the back windows on. The idea was to leave the same side empty on each house so I could more easily put them back to back. |
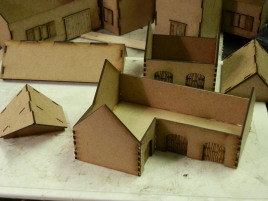
The Mansard Roof House
The major difference with this kit is simply that it's bigger. I found
that using the clamps helped -- it didn't really need heavy pressure
but something holding the thing together while the glue dried. Large
rubber bands would probably work too.
I left the doors and windows off at this stage, figuring they'd be easier to
paint separately. In the end I decided to leave the windows off completely.
The kit does not come with an interior floor, so I built one from scrap
board I had at hand.

|
|
|
| Assembling the house. |
More clamps to the fray. |
Adding the mid-level floor to the mansard house. This didn't come in the kit, but it's easy enough to do. |
|
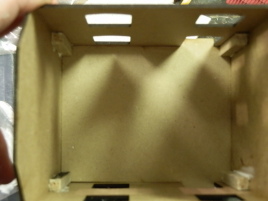
| Supports for the floor. |
The 15mm Buildings
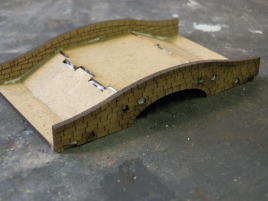
I also got a few items for my 15mm armies, namely a small bridge and
two different barns. This is almost the entire Warbases 15mm range. The
roof on the larger L-shaped barn takes a little bit of figuring out
to assemble, but otherwise these are pretty straightforward to build.
The bridge is a bit tricky, because the parts interlock in so many ways
you basically have to snap them all together at the same time.
|
|
|
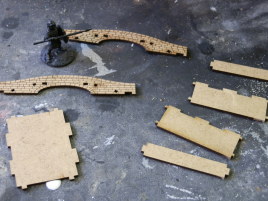
| Here are the bits for the single arch 15mm bridge from Warbases. |
Here's the bridge assembled. It was a bit fiddly to put together because the parts interlock in multiple ways. |
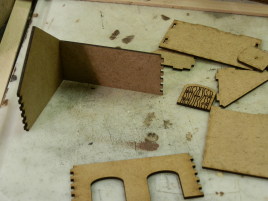
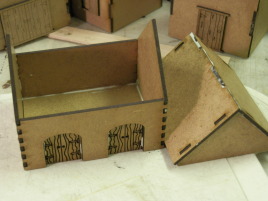
Dry-fitting the small barn. |
|
|
| The small barn assembled. |
And here's the large L-shaped barn. |
Painting
The Modular Buildings
Okay, these guys pose something of a dilemma. The walls are basically
featureless slabs. While you could just paint it, it would leave the
doors and windows sticking out a bit and the corner jigsaw joints
would like be visible. One option would be just boarding over the corners
with bits of card.
These will definitely look better if you bother to do some sort of raised
texture. I thought about glueing textured plasticard on them but finally
decided on mediterranean stucco look I had been planning to try out
anyway. I mixed some tiling grout with water and white glue. Following
the instructions on the package resulted in way too thick a mix so I
just kept adding water and glue until it seemed right. You want this
thin enough to apply with a stiff brush, but thick enough not to run.
If you're pedantic about scale, the texture is really way exaggerated
but I think it looks good. These are mostly going to be viewed from
some distance and too subtle effects are just lost.
After the texture had dried, I painted everything with ordinary indoor
white paint. Had I thought this through, I would have started with a
darker color, maybe beige or light gray. Since I wasn't, next step was
applying a light wash of gray made simply by watering down another
interior paint. A heavy drybrush of the original white finished the
basic coloring.
|
|

|
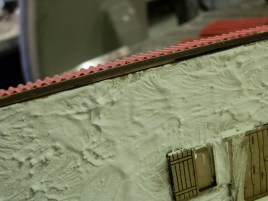
| Applying the surface texture. |
The texture is a mix of tiling grout and white glue, simply brushed on. |
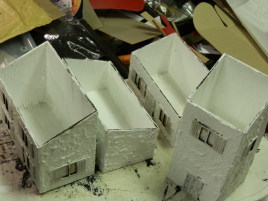
I painted them white. Probably should have used a light grey or beige instead and applied a really heavy drybrush. Now I need to wash these. |
|
| More base-coated buildings. |
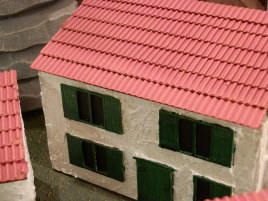
The Mansard Roof House
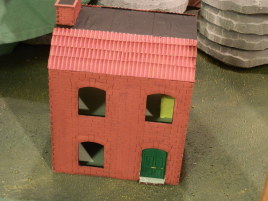
This kit is different. The walls are completely covered in laser-engaved
brickwork pattern. While you could ofcourse stucco over this too, I wanted
to preserve it instead.
I simply painted the walls with a brick red interior paint. The thing to
watch out for is that the engraved detail is really fine. It's really
easy to clog if you apply paint too heavily. Try to keep the brush
mostly dry and avoid pressing into the details.
A wash of black finished the paintwork.
|

|
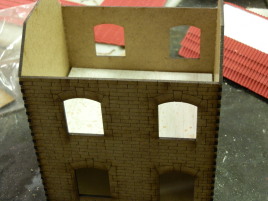
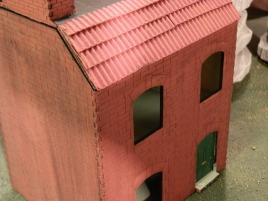
| The kit comes with windows, but I left them out so my figures can see out better. It's a bit too red, maybe I should have painted the tiles another color. |
The kit does not come with an interior floor, but it wasn't too hard to make one. To facilitate lifting the floor while it has minis on it, I screwed on a piece of 'furniture'. It was a late addition, next time I'll make a nicer piece in advance. |
The 15mm Buildings
I painted these exactly the same way I did the modular buildings.
However, I did learn something and covered the doors with masking
tape prior to applying the texture.
Roofing Work
All of these kits come with plain roof panels. For the modular
buildings they are just slabs, but in the case of full roofs the
roof struts actually lock into the roof pieces. You really have
to cover these with something to make them look good.
Doing shingles out of thin cardboard is a trick I've used many times
but I wanted something a little different here. I tried to get some
roof tile plasticard, but I couldn't find a store that sold it for a less than
an arm and a leg (the ones that have reasonable prices seem to employ
armored convoys for delivery at least judging by their postage rates).
Fortunately I found some corrugated cardboard at a local hobby shop.
This stuff has way finer detail than the kind seen in packaging. While
it costs money unlike packing scraps, it's still way cheaper than textured
plasticard.
I thought about cutting separate tiles ang glueing them on individually,
but the seam on neighboring tiles is probably not going to be very
visible anyway so I just cut strips from the cardboard and glued them
one in slightly overlapping rows.
The downside of this material is that it's pretty fragile. If you handle
the pieces roughly, you will leave marks. Also, it's very easy to tear
if you cut it while it's still wet from the glue.
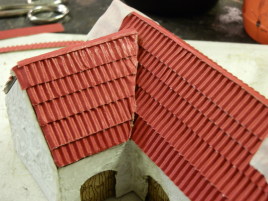
The mansard roof presented a small dilemma. I have no idea what
the flat top section of a mandard roof is supposed to look like.
I tried to search for pictures, but buildings are rarely photographed
from an angle where this would be visible. I figured tiles or shingles
really wouldn't work on the flat section so I glued on some paper strips
to simulate tar paper or similar material.
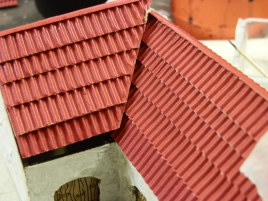
The L-shaped barn posed another problem. The roof comes in two parts.
While I guess you could glue it all together, I left them separate. The
parts have a pretty tight fit even bare. After adding the tiling
they just didn't fit anymore, so I had to bring out a knife and carve
the smaller piece a bit. Not exactly waterproof fit anymore, but at least
it fits.
As a final detail, I glued a piece of scrap wood on the underside
of the modular building roofs to stop them from sliding off. You should
note that while the roof panels for these kits are identical in size,
the angle on some of the roofs is slightly different. Fit them all and
mark which roof goes with which building style.
|
|
|
| A veritable tiling factory. |
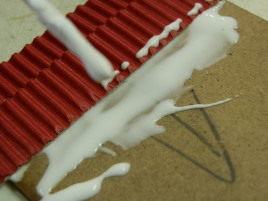
Gluing the tiles on. |
The curse of white glue: warping evident! |
|
|
|
| Roof tiles for the small barn. |
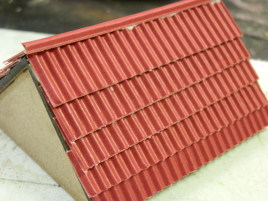
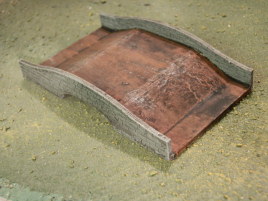
This is the small mansard roof house kit from Warbases. Actually, the top of the roof posed a big dilemma, because I have no idea what it's supposed to look like and finding pictures from that angle wasn't easy. I figures tiles or shingles on the flat part make no sense, so I glued some strips of paper to simular tar paper. |
The L-shaped roof is in two pieces. Maybe I could have glued them together, but tiling it would have been more difficult... hmm... |
|
|
| Houston, we have a problem! The roof fit is pretty tight so with the tiles in place it doesn't fit anymore. |
After some knifework, the roof fits again. Unfortunately, some tiles were crushed in the process. |
Detailing
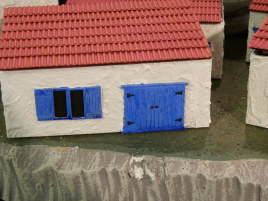
All that remained was painting the doors and windows. To add some flavor,
I painted part of them blue and green. A simple inkwash later they were done.
The Final Result
|
|
|
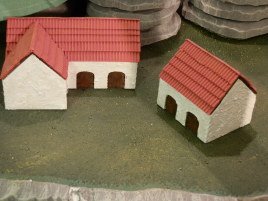
| Here are the barns I made from the Warbases kits. Pretty nice, I think. |
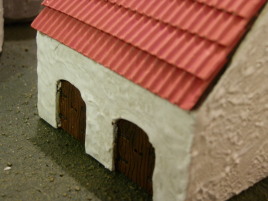
This is the smaller of the barns. It can hold two infantry bases for you know what game. |
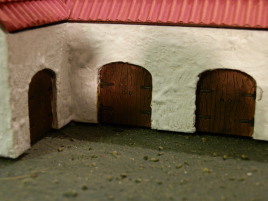
The larger barn has three doors. One of the slots for the door pieces was slightly offset (and I didn't fix it), but I don't think most people will notice. |
|
|
|
|
| The kit comes with windows, but I left them out so my figures can see out better. It's a bit too red, maybe I should have painted the tiles another color. |
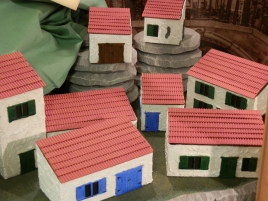
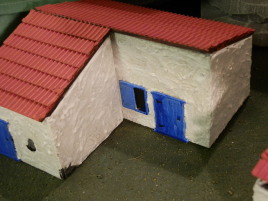
Here are my modular buildings from Warbases. |
To add some color, I painted some of the doors and windows blue and green, which is what they really do around the mediterranean. |
|
|
|
| I thought about keeping the doors and windows separate, but in the end I decided to glue them on. It was the right thing to do, with the stucco finish it would be pretty much impossible to blu-tac them on neatly. |
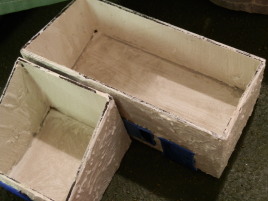
And here's the cunning plan: On the back wall the doors and windows are always on the same side so... |
... that when the buildings are placed back to back, the gap is as small as possible. |
|
|
|
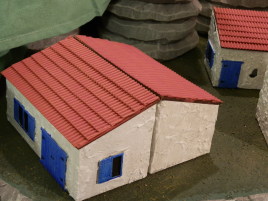
| Here's another possible setup. |
I left the interiors pretty bare for now. |
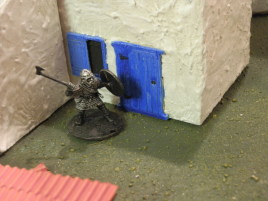
Size comparison. That's a Gripping Beast plastic 28mm saxon knocking on the door. |

|
|
| The two-storey building next to a single-storey one. |
This is a small bridge from Warbases. It's laser-cut MDF. |

This work is licensed under a Creative Commons Attribution-NonCommercial-NoDerivs 2.5 License.
Copyright 2003-2021 Mikko Kurki-Suonio
 Sucks!