 Historical miniatures often come with separate spears or assume that you
are going to make your own anyway. These come in two basic varieties: cast
white metal spears and spears made from steel or brass pins or wire.
Historical miniatures often come with separate spears or assume that you
are going to make your own anyway. These come in two basic varieties: cast
white metal spears and spears made from steel or brass pins or wire.
Historical miniatures often come with separate spears or assume that you
are going to make your own anyway. These come in two basic varieties: cast
white metal spears and spears made from steel or brass pins or wire.
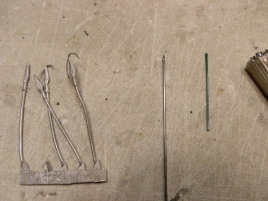
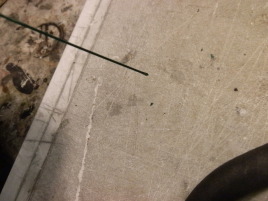
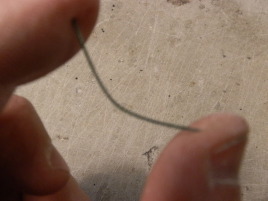
The white metal ones allow nicely sculpted spearheads and other doodads, but arguably can be overscale. But the main problem with the is the excessive bendiness. They rarely survive even in the blister pack, as you can see from the picture. Prolonged use leads to your armies looking like they came from Tactica...
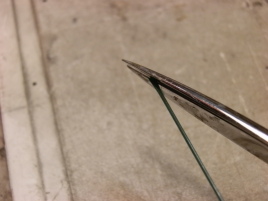
Steel and brass are more durable, but they can cause actual injuries if you are not careful around them. Those spearpoints are real needlepoints! In addition they don't have any flexibility, meaning if you drop the model all the stress is going to the glue join in the model's hand. With drilled ball fists (does anyone even do these anymore?) that is fairly secure, but open palm joins are very liable to breakage.
And let's not even get into the spears on plastic models...
To solve this dilemma, I came up with the following solution: Resilient plastic spears. I honestly don't remember anymore where I got the idea from, but I perfected the process myself.
Here's how they are done:
|
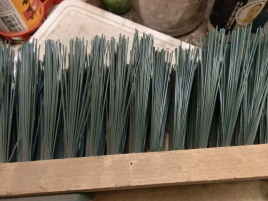
Get an ordinary street sweeping brush. Make sure it has straight plastic bristles. |
|
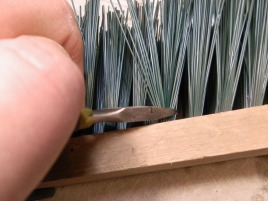
Snip off required amount of bristles. Use proper pliers, scissors don't quite have the leverage. |
|
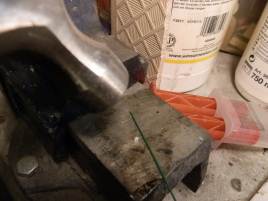
Hammer the end... gently. |
|
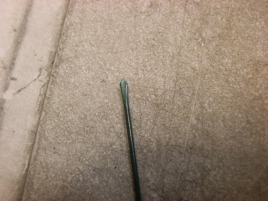
This is how the blade looks after hammering. The more you hammer, the wider blade you will get. |
|
Use scissors to cut a point into the blade. |
|
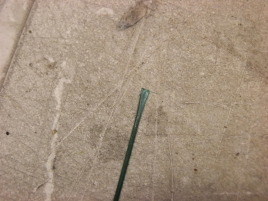
Finished spear blade. Just stick it on with superglue and paint. |
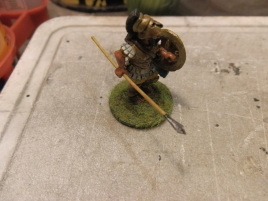
And here's what you get for you efforts. Reasonably scaled spears that can take a bit of beating but won't bleed you white.
You do need to use superglue to fix them, but otherwise they take paint just like the model. No need for any PVA coating tricks or anything like that.
As the blade and the possible butt spike are not sculpted, you will need to create them with paint. This is easy, though. You will also find that the shaft is really too thin for any fancy painted-in wood grain, so just give it a wash and call it fine. I challenge you to see the woodgrain on a real broomstick from over 3 feet away...
|
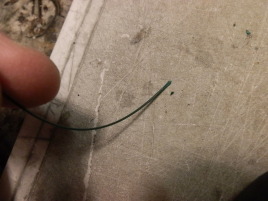
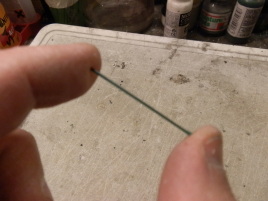
It bends... |
|
...and pops right back! |
|
This is what the finished product can look like. |

|
There's still flex in it and even the paint won't flake. |
|
Back to normal. |
|
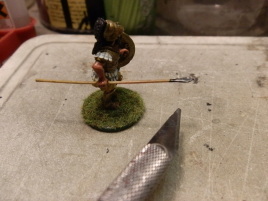
And unlike steel spears, you can't hurt yourself with these. |
|
With a steel spear I'd be bleeding right now... bleeding from a Small Cut! |
Caveat emptor: They are not indestructible! If you bend too far, they can take on a permanent bend or even break. Fortunately replacing one is relatively easy if necessary.
 They are ok even for flag poles. Here I just superglued a spare plastic
skull on the end of the pole instead of hammering out a blade.
They are ok even for flag poles. Here I just superglued a spare plastic
skull on the end of the pole instead of hammering out a blade.
P.S. I think this is one of the few cases where a short video would actually be more useful. Drop me a comment below if you'd really like to see one.
P.P.S. Don't try to be a cheapskate and use an old brush for this. I've tried it and basically the years of rain and shine have destroyed the elasticity in the bristles. If they've lost their original color, consider them gone for good.

This work is licensed under a Creative Commons Attribution-NonCommercial-NoDerivs 2.5 License.
Copyright 2003-2021 Mikko Kurki-Suonio
 Sucks!